In this video Kyle starts off with an introduction to the video where he talks about the aim of his video, he is looking at/towards the camera pretty much the whole time this helps make us the viewer feel involved, as if he is talking to us. He has recorded comparisons between the built in mic and the external mic this can help people decide what set up is best for them and helps him show the differences. He is showing some devices that he has used in the past which he has had good experiences with this could help us decide what is worth our money if we was looking into the market to buy a microphone, he shows us a couple different options as to what we could buy (more budget options and more high end). Kyle has given really detailed explanations about how recording works and shows us what to do and what not to do, this is good as some people learn better from visuals rather than just voice. He has used a few different shot types throughout the video such as a medium close up shot and medium shots, the use of captions help with the visual aspect of the video with onscreen information to help further his explanations. Kyle has also used background music which means the video never feels like it has any gaps in it, this helps create depth in the audio and has made the final outcome achieve a higher standard.
I only analysed up to 10 minutes on this video due to it being so long.
At the very beginning of the video there was a relevant animated graphic for this type of video. John then starts the video by introducing himself and tells us what his aim of the video is. John does the same as Kyle by looking at the camera the whole time this helps make the viewer feel included. we have sound fx throughout the video such as the chalk sounds this helps create depth into the audio due to there being no background music this video would seem shallow if it was only johns voice you could hear. The voice over in this video has been recorded really well, Johns voice sounds nice and crisp. There are lots of animated graphics in this video which help illustrate what he is talking about and makes the explanations easier to understand. John goes into a lot of detail about how recording works and how different setups give you different outcomes, he does this by giving us pros and cons on each setup and by giving lots of professional information on each one, he also uses lots of keywords which he then goes into detail about which helps show his expert knowledge on this topic. John gives us lots of tips that he has learnt over his career to help us if we was aiming to record something with these setups.
In this video, Julian introduces himself and the aim of the video straight away the video then cuts to his own animated graphic of his name the background music sound level increases for the animation then goes back down to a quieter level once the voice over takes over. Julians voice over is really good and crisp and the video quality is good, although Julian has had the same problem as I did for my How To video where parts of the recorder go out of focus which is very annoying. Julian has some captions (one being to correct himself). He has used enough detail with visuals and his voice that we get really good and understandable instructions, sometimes people can over describe which then makes things become confusing. A really good thing that Julian has done is that he has visually shown each step, showing each step and focusing on each part of the recorder helps everyone understand better and makes it easier for someone who is trying to learn how to use this recorder.
Proposal
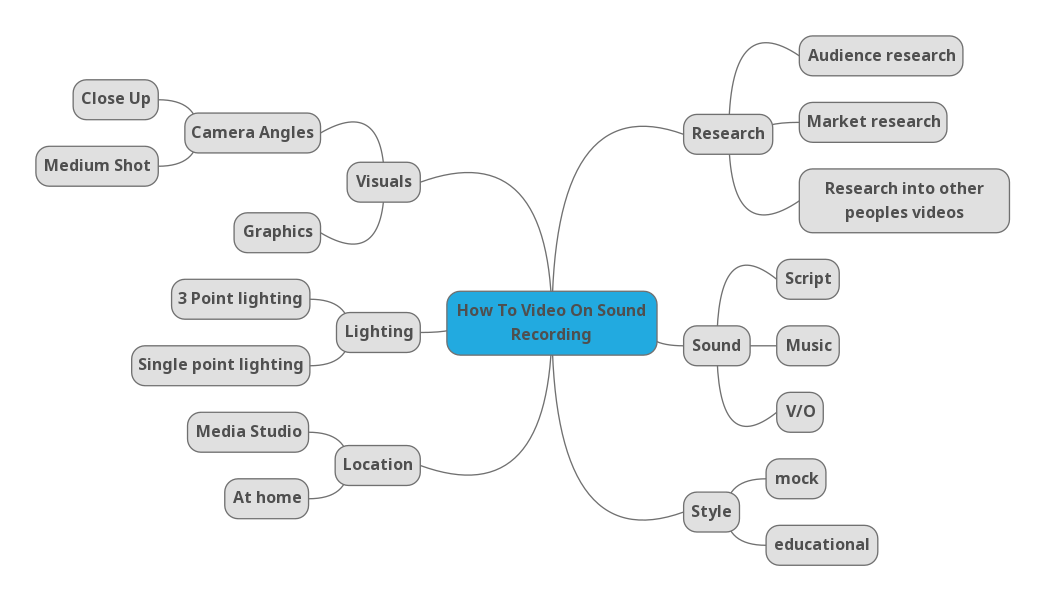
Mind Map
https://activatelearning-my.sharepoint.com/:w:/g/personal/19068588_activatelearning_ac_uk/EQNlB6YQWw1BvbC6E_eDH6oBWTALL7_fDuTlZusfzR0tOg?email=19068588%40ActivateLearning.ac.uk&e=sk5dWc
Production Schedule
https://activatelearning-my.sharepoint.com/:x:/g/personal/19068588_activatelearning_ac_uk/EbNvrO-q2R9GoAdXDRPW-HIBkClLtafZapJx-ioMSK6wwA?email=19068588%40ActivateLearning.ac.uk&e=OkfCMN

Location Recce
Shot List
https://activatelearning-my.sharepoint.com/:w:/g/personal/19068588_activatelearning_ac_uk/EaPDKyfOnc5EtkfSPFGGhQ0Bi_TIqPAuE6WfxKiJ3YQn-A?email=19068588%40ActivateLearning.ac.uk&e=xJgysN
https://activatelearning-my.sharepoint.com/:x:/g/personal/19068588_activatelearning_ac_uk/ETU_F5CO1DhAiVp8oWuJIjMBGcXmGbVmbMRSa4Q6uPUIAg?email=19068588%40ActivateLearning.ac.uk&e=89JjIZ
Script
Hello and welcome to my how to video on the H1n Handy Recorder, today i am going to show you a few features before you use one. On the left hand side the "Line Out" port where you can insert headphones to listen to what you've recorded, there is also a volume button so that you can turn the audio that you are listening to up and down. As you come around to the back you can see there is a removable piece of case where you can place batteries so that the recorder has power. On the right hand side there are a few more ports, there is the charging port, the on and off switch, the delete button which means you can delete certain audios off your SD card to use the power switch you have to hold it in the on/off position to make the recorder turn on or off, as you come up to the top of the recorder there is a little flap which when you open you will see the micro SD card slot where you will insert a micro SD card to use for storage and the "Input" port where you can insert different audio recording devices (microphones). As you come around to the front you have a variety of different buttons to help you navigate the sound recorder itself, you have a record button to start recording, a stop button which is to stop the recording, a play and a pause button and a pause and rewind button, all these allow you to play back the audios you've recorded. As you come up the front of the recorder you can see the two built-in microphones so that you aren't required to plug in any microphones. Thank You for watching and i hope this helped.